The Ultimate Guide to Burning Movies and Files onto Blank DVDs

In today’s digital age, people consume various forms of media, including movies and TV shows, on their electronic devices. However, there are times when people may prefer to have a physical copy of their favorite media to keep and watch on their TV, especially when there is limited or no internet connectivity. Burning movies and files onto blank DVDs is one option to achieve this. In this article, we will guide you through the steps to burn movies and files onto a blank DVD.
Understanding DVD Formats
Before we dive into the process of burning movies and files onto blank DVDs, it’s essential to understand the different types of DVD formats. DVD-R and DVD+R are the two primary DVD formats.
DVD-R: This format is compatible with most DVD players and is commonly used for general-purpose recording.
DVD+R: This format is similar to DVD-R, but it has some technical advantages, including faster recording speeds and error detection capabilities.
While both formats are commonly used, it’s crucial to understand the capabilities of your DVD player before choosing a format. Some DVD players may not support both formats, so it’s best to check your device manual before selecting a DVD format.
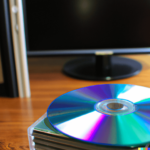
Choosing the Right Blank DVD
After understanding the different DVD formats, it’s essential to choose the right blank DVD to burn your movies and files onto. Blank DVDs are available in various sizes and capacities, including 4.7GB and 8.5GB. It’s essential to select the right size DVD to fit your movies and files.

In addition to the DVD size, it’s essential to consider the quality of the blank DVD. Cheaper and low-quality DVDs are more likely to have errors during the burning process, which can cause the disc to fail. To avoid this, it’s best to choose high-quality DVDs from a reputable manufacturer.
Steps to Burn Movies and Files onto Blank DVDs
Now that we’ve covered the basics, let’s dive into the steps involved in burning movies and files onto blank DVDs.

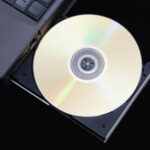
Step 1: Insert the Blank DVD
Insert the blank DVD into the DVD burner. Your computer should detect the disc automatically and prompt you with options to burn files.
Step 2: Select the Files to Burn
Next, select the files you want to burn onto the DVD. This can be done by either dragging and dropping the files onto the DVD drive icon in the file explorer or using the built-in Windows burning tool.
Step 3: Start the Burning Process
Once you’ve selected the files, it’s time to start the burning process. In the file explorer, click on the “Manage” tab, followed by “Burn files to disc.” This will open the Windows Disc Burner tool, where you can select the DVD format and set the burning speed.
Step 4: Finalize the Disc
After the burning process is complete, it’s essential to finalize the disc. Finalizing the disc ensures that the data is written permanently onto the disc, making it readable by other devices. To finalize the disc, select the “Close the session” option in the Windows Disc Burner tool.
Tips for Successful DVD Burning
While the process of burning movies and files onto blank DVDs is relatively straightforward, there are a few tips to ensure a successful burn.
- Use High-Quality Blank DVDs: As mentioned earlier, using high-quality blank DVDs is essential to avoid errors during the burning process.
- Use the Right Burning Speed: Burning at too high or too low speeds can cause errors during the burning process. It’s best to choose a burning speed recommended by the manufacturer of your DVD burner.
- Avoid Burning in Direct Sunlight: Direct sunlight can cause temperature fluctuations that can interfere with
Burning movies and files onto blank DVDs is a simple process that allows you to have a physical copy of your favorite media that you can watch on your TV, even without an internet connection. Understanding the different DVD formats, choosing the right blank DVD, and following the steps outlined in this article will ensure a successful burn.
It’s essential to remember that using high-quality blank DVDs and following best practices, such as burning at the recommended speed and avoiding direct sunlight, can help prevent errors during the burning process. With a little practice, burning movies and files onto blank DVDs can become a regular part of your media consumption routine. So, go ahead and give it a try, and enjoy your favorite movies and TV shows on the big screen!